Posted on Leave a comment

Temperature Blankets

It has been forever since I did a blog… which how I seem to start these posts! Life just got in the way really, and when I did have chance to write a blog post, I didn’t really know what to write about!! But now I have time and an idea so I’m off!

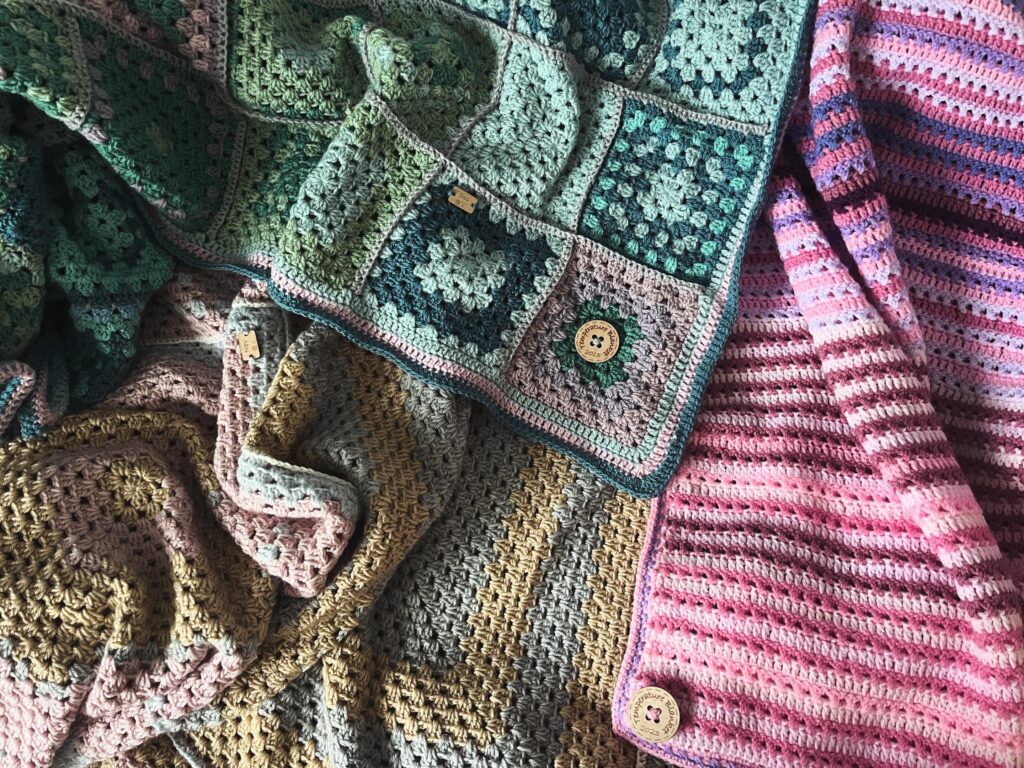
I’ve written a bit about temperature blankets before, but I’m going to give a bit of an overview of the three I’ve done. Hopefully this will be a bit of a starting point too for anyone who wants to start but is unsure how to!

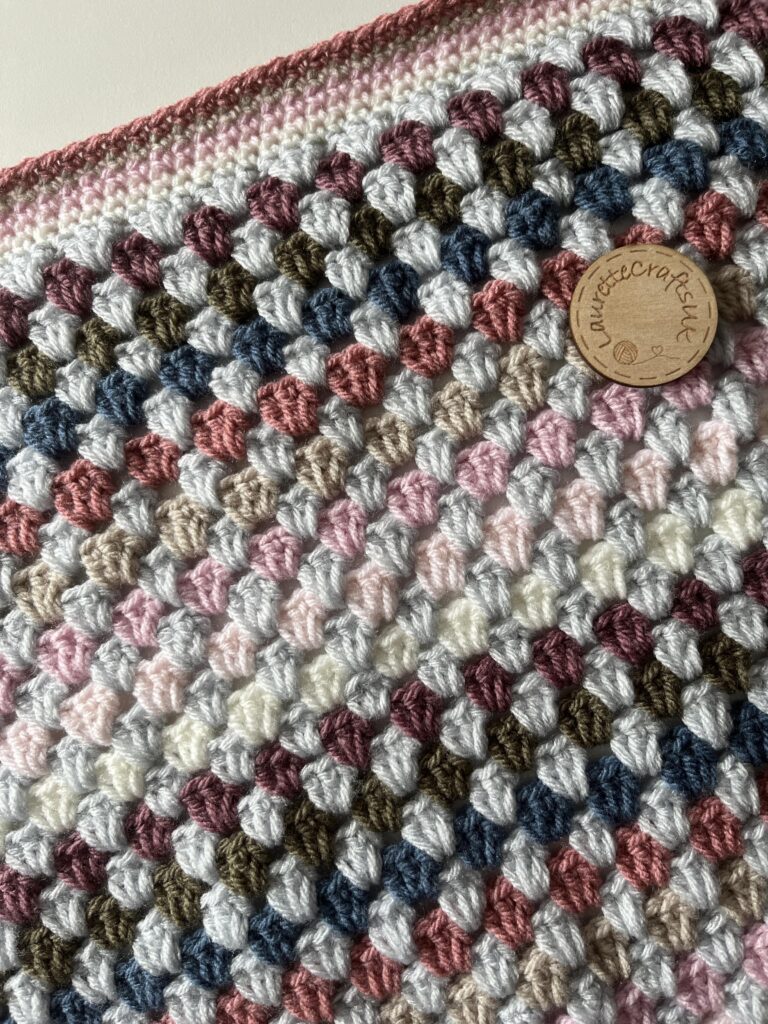
I’ll start with the first one I made – 2022’s. For this one I used some beautiful shades of Deramores Yarn, and made one granny square per month. I used TimeandDate.com, and the highest temp each day. I then did a round per day, but on months less than 31 days, I repeated the last colour of the month until the granny square reached 31 rounds. I then joined them all together but it was so huge, that I joined 3×2 for the front, and did the same and joined them back to back to form one huge heavy snuggly blanket. Sadly these colours/yarn can’t be found anymore, but I did find some really similar colours which are listed in my Lydias Blanket pattern, which is a free download on our website.

Moving on to the other granny square temperature blanket that I completed last year, but for 2015. I had the idea of using the beautiful Attic24 Dune blanket kit and it worked out beautifully. I’ve seen someone recently plan theirs using the Attic24 Harbour blanket kit which looks like it will work out brilliantly. So if you’re not sure where to start, or you’ve seen some colours you like in an existing kit then why not use them as inspiration for your temperature blanket! For this one, I created a granny square per week completing a round per day. I topped up these to give me the right amount but can’t quite remember how – I might have just tracked an extra week or two I think. I then made this into a runner! If any of you have seen pics of my craft room, you’ll see its seaside-y themed so this runner fits the bill perfectly.

Moving on to 2023’s. I fancied a change and went for bright pinks and purples for this one! More yarn from Wool Warehouse, and this time using their Yarnsmiths range that I love. I used my Lydias Blanket pattern for this one, and completed just two rows a week as I wanted a more manageable project. So for this one, I tracked the lowest temp and highest temp each week.

The beauty of a temperature blanket is you can track whichever temp you want – the highest or average is probably the most common, or the highest and lowest tracked together. If you’re away on holiday, I choose to track the temperature of wherever I am, whilst others track it at home.

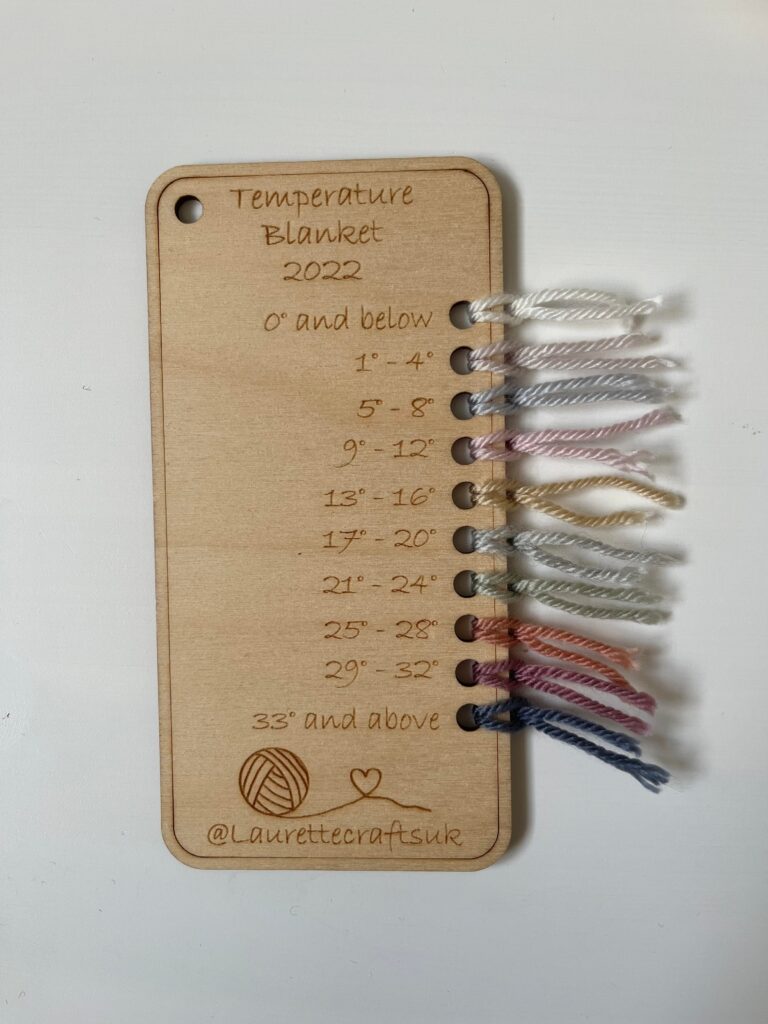
We have a range of items to help you too! Our shade cards are available in both Degrees Celsius and Fahrenheit, and offer a range of temperatures. The more holes you chose, the more variation in colour you will see in your blanket (but the more yarn changes you will need to do too!). I’ve gone for fewer this year, but as I’m tracking the highest and lowest temps I don’t think it will make a big difference. Fancy a different range of temps, or to track something else entirely? We do fully customisable shade cards as well as blank ones for you to write on so there is flexibility to create whatever you want.

We also offer a range of different shaped buttons so you can mark the month and year. Have a special event you want to mark with a button? Just drop us a message and we will happily create one for you. As well as this, we have our temperature blanket photo props, and naturally crochet hooks to create your blanket! Our pegs and tags are a lovely finishing touch which are not only pretty to photograph but also help to differentiate between yarns, especially that are similar in colour.

Fancy tracking something else? I’m currently making a bookworm tracking the genres of books that I’m reading too. We’ve also been asked about making shade cards tracking mood and rainfall. Anything that you can categorise, you can track!

I hope that helps give a bit more info about temperature blankets, but any questions, just ask!
Posted on Leave a comment

Carry on Crafting!

Oh my goodness.. it’s been a whirlwind over here, most recently with Carry on Crafting which was SO much fun!!

Its a bit of a trek from us but absolutely worth it, and we loved camping over! The food was amazing, we sat out on a night chatting to others stopping over, and had the best time putting faces to names and meeting so many of you wonderful lot in person. Believe it or not, me and Rich are really shy so its always really nerve wracking doing things like this for us. The atmosphere though was so lovely and friendly that it was impossible not to feel comfortable. HUGE thank you to everyone who took the time to visit us, we really do appreciate it so so much.

There wasn’t much time to have wander and the days flew, but I did manage to sneak off a few times. Whilst there, we got chatting to our fabulous neighbour Lyndsey (Crafting with Lyndsey) who makes these amazing kits. Naturally I had to have one and it had to be these gorgeous blues and greens to go on my craft room wall – I’ll share another pic when its in place. I was going to post some lovely pictures of the kit itself, but I opened it, couldn’t resist trying it, and now have a completed weaving!! I have never tried weaving before but loved it and now have lots of ideas for more projects!

I also can’t resist glass. I had the fish (along with a recycled garden decoration which is beautiful, but too tall to fit on a photo!) from Mandy at Morphed By Mandy and its just so lovely. The feather glass piece is from Louise at Craft Days Glass, and I love it because I find feathers *all* the time and like to think they’re from my mum. I don’t have a photo as its currently working its magic with alcohol, but I had a Fruitology jar that you just add alcohol too and it infuses – it looks amazing, I’ll update following a taste test when its ready! Our neighbours the other side (Little Bird Creations Kent) were so lovely too, and they ran classes painting peg people. I had the best time watching what people came up with, they all looked amazing! So of course I had to buy a set as although I’d love to paint them, I think my boys might love to even more.

And here is the blanket I was working on whilst chatting away at the weekend. Its getting there now, just working on the border which is a bit of a slow process but it will get there.

The other great thing to come out of the weekend was lots of new ideas. We absolutely love working with others to come up with items that meet their needs – so watch this space as you will hopefully be seeing our items in a few new places soon! We also have lots of ideas for our own things too (including Christmas-y things if I dare to mention it already in July!!), so lots to keep us busy. Huge thanks to you all as always xxx

Posted on Leave a comment

A long over due blog post!

Hello!! I’m so sorry it’s been so long. I am in the middle of writing my dissertation, and between that, work, and a currently hectic home life, I just haven’t had it in me to write a blog post. But today is the day! I really do enjoy writing them, so its nice to find that time again.

We have been up to lots of bits and bobs lately, including camping, lots of day trips out, and most recently, a trip to the theatre to see Annie! The boys both loved it (well not Miss Flanagan!!) and it was a lovely night – even Emmett only drifted off at the very end!

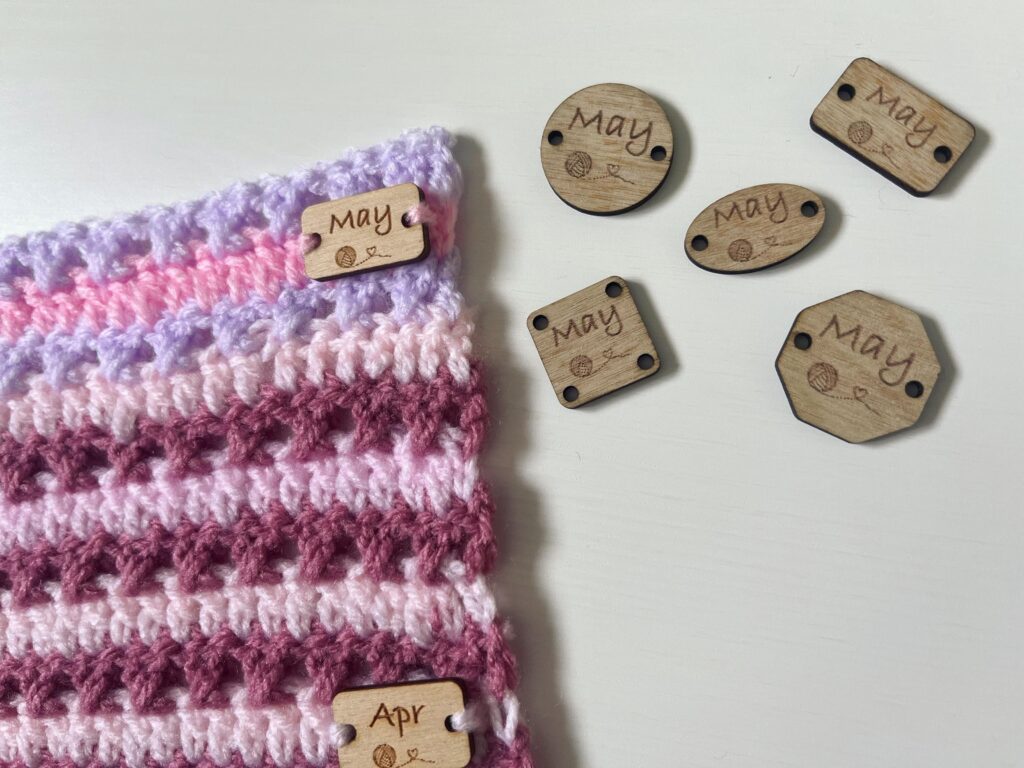
Back to business. Sourcing wood has been increasingly challenging. This has been a problem for most who use Birch Plywood. We did look at using alternatives, but we found that none met our standards (which you all know are very high!). They were either too soft, had a very different appearance or simply just weren’t fit for our purpose. We very luckily have been able to identify a reliable source which meets our needs. This wood is still classed as Birch Plywood but is from a different area. This means that its appearance is a slightly darker/warmer colour than our previous stock. Here’s a pic below where you can see our previous wood (sewn on to the blanket) and new wood:

Just to add too – we will try not to mix woods in your order and can guarantee that we won’t if you are buying a set. For example, if you buy a set of month buttons, they will all be cut from the same wood. We have started using this new wood already, and you will notice soon that it is the only wood we have. We will be updating our product photos gradually. We have such an extensive stock range that this is a mammoth undertaking!! We will also be adding notes/pictures to all our items, and hope to have this done over the weekend.

Not only does the wood meet out needs, it is also reasonably priced. The price of wood has rocketed since we first started LauretteCraftsUK, but fortunately whilst this wood is a higher price than previously, we are able to absorb this and do not need to make any changes to our pricing at present. It is part of our ethos that we will also offer the lowest prices that we can, directly to all of you. Etsy is an amazing platform to showcase our items and it also enables to ship internationally more easily. That said, it does incur a high fee rate. So whilst we will continue to use Etsy, we do also have all our items on our website at our best price for those of you in the UK. We know it isn’t always as convenient but please do consider using our website if you are UK based (and it will give you the best price too!).

We (well I, Lydia!) always have lots of new ideas for Rich to be working on. You are all absolutely amazing and have kept us so busy that we simply haven’t had time to work on these. We are still busy but are working on carving out time to start working on new products and items. As always, we welcome suggestions too so feel free to get in touch with these. The photo comparing the woods above is one of my ideas – month buttons but in different shapes to best compliment your blankets! We have the month buttons cut, and Rich is now just working on designing and then test cutting co-ordinating year buttons. These should be ready in the coming weeks and we will get them listed for you!

Thanking you all as always for your on-going support which enables us to keep doing what we love, and making lots of lovely items for you to enjoy!

Posted on Leave a comment

Feb 23

Just a bit of a catch up blog really! We are at the tail end of half term now, and it’s been a lovely busy week off. We have had chance to catch up with lots of family and friends, as well as go out and about exploring. The boys have loved it, and we have had lots of fun.

I have also had lots of free time to crochet!! Catching up and finishing my mermaid-y blanket has definitely been a highlight. I’ve also had chance to make a start on a baby blanket from and keep my temperature blanket up to date.

And perhaps most excitingly for me, I have taken the leap, called my Lydia’s Blanket pattern an actual pattern at last, and written it up! Its available now as a free download here on the website. It includes images and videos of all the stitches needed so should be suitable for all including beginners! I used Deramores yarn in my original so I have also updated my yarn selection, and should you want to use the same colours as me, you can even order a shade card for it!

Any questions, or if you spot any typo’s or errors, do let me know and I can update it for future versions. We will rename the versions as we go so you can always check if there has been an update since you downloaded it – we are currently at version one! If you do give it a go please do tag us on social media as we would LOVE to see!

Posted on 1 Comment

A just because blog!

A blog because I fancy writing a blog!

Last week, I joined Rich in the workshop for the day, and whilst he worked on making things, I tided, and then together we packed and posted orders. I had to leave for the school run, but Rich kept going and we managed to get 46 orders dropped off at the post office that night!! Rich commented when he got home, on how when he was stood in his (now tidy!!) workshop with his bundle of parcels how proud my Mum would be. And she really would, but I bet she never imagined that this is what he/we would have ended up doing!

I know I’ve told this story before on a blog post somewhere, so I won’t go into detail, but Rich started with a 3D printer and the ability to create files for these for scenery for table top gaming. He put these on KickStarter, and my Mum was so keen to support him that she would pledge to support him even though she had no clue what the files were really, nor any interest in table top gaming! My Mum knew that Rich had a goal to purchase the full license needed for the software he uses to do his designs, but sadly passed away before he achieved this. He had particular success with a Kickstarter not long after, and this fuelled him to not only buy the license but also his laser cutter.

At this point he was still anticipating to be focusing on table top gaming scenery, but after I asked him to make a few things for me, it’s been crochet/knitting related accessories ever since! It’s been a journey, but not one we would change in the slightest. The nicest thing for us is that it combines my love of crochet and Richard’s enjoyment in designing and making things, to give us something that we love working on together. My favourite bit is when we go to yarn shows – I tend to sneak off, chat, and buy lots of things! Whilst Rich gave up his day-job for a short while whilst he got set up in his workshop and established, we both realised that we valued the security of his day job! He also enjoys it which is a bonus. So now we both work day jobs, and enjoy that we have been able to share our hobbies with you. So whilst my Mum always had every faith that Rich would achieve his ambitions, I’m not sure that any of us anticipated it going in this direction, nor getting to the point that we have.

I can’t believe how lucky we are to be able to do this. I love having a blog and “meeting” new people on social media and having a chat. I love the crochet community on social media, and having LauretteCraftsUK has given me the confidence to share my work. It’s also given us opportunities we never dreamed we would have – supplying stores in America with our makes, being asked to be a pattern tester, as well as having companies and crocheters that I admire interacting with us. But more than that, we love the interaction that we have you all. It isn’t all highs as any small business owner will know, and we certainly have some very stressful moments and challenges. The thing that keeps us going though, are the messages and reviews and feedback that we get. We know shipping has been tricky at times and we are so appreciative of your patience with that as well as your understanding on the rare occasions where we do get things wrong. We will always be quick to respond and rectify where needed, and your appreciation of that really makes such a huge difference. We work really really hard behind the scenes, and knowing how much you love your items when you get them makes it all worth it.

So thank you. We can’t believe how far we have come, and we are so excited to see how far we will (hopefully!!) go, and we couldn’t do any of that without you. Thank you ❤

Posted on Leave a comment

Temperature Blankets and more!

So as 2022 draws to a close, so does my 2022 temperature blanket!! It is huge, so much so that it will be double sided with six months each side. Being double sided will make it a lovely heavy snuggly blanket, and my month buttons mean I will remember which square is which month!

And moving on to 2023, here is the colours that I have chosen:

Yarn is all Yarnsmiths for Wool Warehouse and I love the colours. A bit of a change from last years colour palette! The pattern I will use is my Lydia’s Blanket instructions, which are available on another section of this blog:

For 2022 I have done a round per day on my granny squares – this was okay at the start of each month but took a while when I was getting to the end of each month! I don’t have much time this year to commit to a temperature blanket but still wanted to do one, so I’m doing a bit of a cheats version. I am going to do two rows per week – highest temp and lowest temp for the previous week. This will mean I have a week to crochet two rows, and I aren’t going to make it too wide either! I think I will go for a lap blanket size, similar to the one in the photo.

We’ve also been asked about making specific temperature ranges as well as our standard temperature blanket shade cards. We are more than happy to do that, and you can order these through the personalised option for shade cards. Remember, on our standard temperature shade cards we are also happy to put a different year or leave the year off entirely, and this part can be done at no extra cost.

We’ve also been asked about other ideas for things you could track. So far we have thought of weather, mood… and that’s about it! You could track literally anything at all though that you can categorise in some manner, meaning the ideas are limitless. Our blank shade cards or personalised ones are ideal if you can think of anything. If we get a few suggestions for the same thing then we may add them to our range too! We have also been asked about Fahrenheit temperature shade cards – this can currently be requested on the personalised shade cards, and we are hoping to add these to the range when we get chance. For me though, whilst I was never particularly interested in the temperature as such, I really enjoyed the fact that my blanket colours were organically chosen and I had no influence over what colour would be next.

If you are doing a 2023 temperature blanket I would love to see it! If you have used our items and are sharing them on social media do give us a tag too so we can take a nose, I love to see what everyone is making!

Posted on Leave a comment

Shade Cards

I realised recently that we now make four different types of shade cards that come in three different styles! So, here’s a quick overview of our range and how I use them!

Firstly, what are shade cards? Shade cards are cards on which you can store a little sample of the yarn you are using. You then use the shade card to compare the sample yarn to your yarn ball whilst following your pattern so that you can check you are using the right yarn. I know for me, as soon as I open a ball of yarn, the label is discarded and then I’ve got no clue which colour name goes with which yarn ball. That’s why shade cards (and our yarn tags) are so handy, especially when using similar colours!

The first type of shade card we made was the blank one. It comes in three styles – I tend to use a ring binder style. This has two holes to slot into a ring binder, and perfect for storing with your pattern. I also have a little A5 ring binder that I use to store shade cards that I don’t have paper patterns for. I tend to write the name of the pattern at the top too so that I don’t forget it! For my temperature blanket however, I prefer a shade card with one hole. I use one of our rings to keep it with my yarn tags, as this one gets referenced so often and I don’t need a pattern as I’m making granny squares this time. I don’t tend to use the ones with no holes as often, but, if you do want to store them in a folder afterwards it is easy to hole punch a plastic folder and pop them in there. This is how I store my extra yarn tags that I don’t have room to keep out on display! It’s also useful for keeping the ones together that we take to markets as examples of how they can be used.

Initially I recommended using a biro to write on our shade cards. This is still the best way if you want a permeant record, but if you’re after something reusable then we offer two options. The first is to use a Frixion Erasable pen on our blank shade cards. They have a rubber at the end which removes the ink but the best method I have found is heat. If you very lightly touch a dry iron to the shade card then the Frixion ink is removed – I have a reel on Instagram that shows this too! It leaves behind a very pale mark where the text was so you couldn’t do this forever, but I have done this multiple times and you can write over the pale marks without issue. If you want a more permeant reusable option, then our engraved shade cards are ideal. Titled “My Current Project” and listing Yarn A, Yarn B etc, these can be reused frequently, by simply changing the yarn in them.

Another option we offer is a personalised shade card. This enables you to have whatever title and yarn names you want engraved on to your shade card! I love this option especially if you have a big project that will take it a while, just to make it a bit more special.

Finally, our temperature blanket shade cards! These come in a range of temperature ranges, but remember, if you we don’t have one that is perfect for you then you can order a personalised one instead to have exactly what you want! These are fab for knowing which colour to use for which temperature and I would be lost without mine.

And just a quick one about our beautiful yarn tags. These will forever be my favourite thing we make I think! Little yarn ball shaped tags for you to wrap your yarn around. I know people use different methods to attach yarn to the tag, but for me, I use hot glue. A dab on the back to attach the first bit of yarn, wrap the yarn around, and then a dab at the end to secure it! Fab for tracking colours, but also as decorations or name tags. We have our festive stockings to as it is nearly Christmas!
If you have any questions about these, or anything else we make please do get in touch! Lydia

Posted on Leave a comment

October half term

Just a quick one, as we are just over half-way through half term which me and Rich have both been lucky enough to not only have off, but also spend on holiday with our boys!

We are having such a lovely time, relaxing and enjoying lots of time on the beach, and of course lots of crafting too. So, here’s a few family photos of what we have been up to so far!

There’s also been lots of time to crochet, knit and do crafty things too! The felt shapes I bought from Yarndale from the fab Joes Toes have been much loved by both me and the boys. They are great little projects – I’ll be using some to go with teachers gifts, some as Christmas tree decorations amongst a few other ideas I’ve got planned for them.

It’s also been a nice chance to catch up with things like my temperature blanket, as well as finish off some WIPs. It’s made me realise how much I use my yarn tags and shade cards, so I’m glad I brought them with me! My temperature blanket shade card is much needed to remember which colour yarn to use depending on the highest temperature on the day, but I do like that yarn tags have a bigger swatch on. I find this easier especially if using colours that are very similar. Also… they’re just super cute! And for this time of year, the festive Christmas stocking ones are ideal… and they double as Christmas Tree decorations when not in use! I also had a few of our engraved yarn pegs with me which I had to photo with my lovely Attic24 Dune blanket which kept me warm on the beach!

I’ve also loved making my scarf following a pattern by the lovely MeluCrochet – it was so clear and easy to follow, plus it worked up really quickly! It’s kept me cosy on holiday, and I’m wearing it in the photo above!

Whilst away we visited Wilderness Cafe in Harlech which has a lovely yarn shop – I was obliged to treat myself to some lovely shimmery festive yarn and white yarn, with the intention of making decorations for the Christmas Tree. Instead, I ended up making a family of hats that fit on corks! I think when we get home though I will add loops to them so that I can still hang them on the tree!

As you know, we have kept our shop/website open, and we have been surprised with how many of you have ordered from us even though you knew there would be a delay in us getting your items out to you. I cannot tell you how much we really appreciate it, and Rich will be spending a lot of time over the weekend at the workshop to get all orders out as soon as possible. We are grateful as always for your continued support, as well as your patience whilst we are away. The time away and catching up with WIPs also made me realise I need a new project! So, watch this space.. yarn has been ordered and is on its way!!

Posted on Leave a comment

Wooden Basket Base

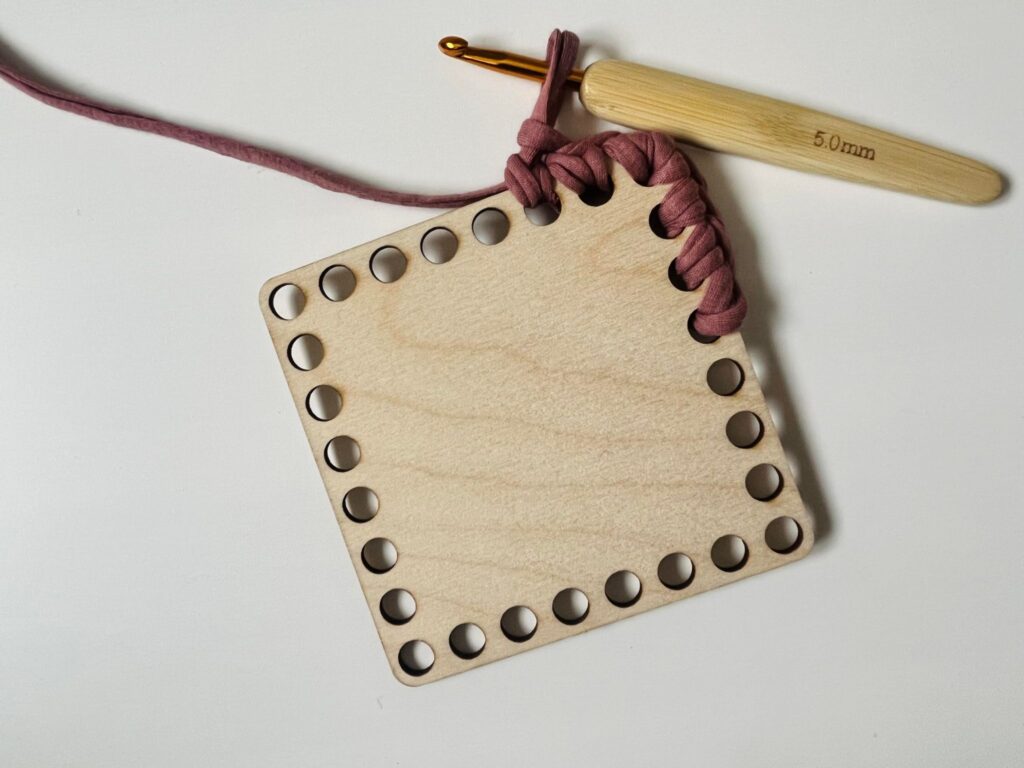
At Yarndale lots of you were asking about how to start off from our wooden basket bases. They are really straight forward to use, and there are lots of tutorials and videos out there, but once you have attached your yarn to the base you can crochet as though it is any other crochet basket you are making! The wooden base will just give it a bit more stability… and of course save you some time! So here’s a few photos to show you how I make mine.

I use t-shirt yarn to make my baskets. I have also used three strands of DK Yarn before but it can be tricky to do it that way! Firstly, you need to decide which side of your basket is the right side, and which way you want this to face. I wanted the right side to face down on this one as I will eventually make it a taller basket. The “wrong” side will have some little marks around the holes from where the laser cuts. These are more obvious on some bases, but on others you will have to look closely!

I use a size five hook initially to attach the yarn and use double crochet stitch. Simply insert your hook into a hole, pull a loop through, and then double crochet your way round! I also crochet over the tail so that it doesn’t need weaving in! Work this all the way round – for squares/rectangles, I do two stitches in the corners.

Then once you have worked all the way round, simply make sure all your stitches are pulled tall facing the direction you want and then you can work your basket however you usually would. I usually join mine, but for this one worked in rounds. I put an extra stitch in the first hole I had started in so that the gap wasn’t too big and then just kept working around.

This t-shirt yarn was quite thin so I continued with a size 5 hook, but I sometimes go up to a 5.5 or 6 depending on the yarn. I have made lots of different shaped baskets, and they all have different uses!

You can see the pink one is still a work in progress! The big one I use for storing yarn, the heart one for trinkets, the Hoppy Easter basket speaks for itself, and the little circle one at the back is for scrap yarn! I crocheted around and then worked up the front (a bit like you would crochet the front of a baby shoe!), attached magnets to the back, and it sits on my crochet trolley. Basket bases are really versatile and make basket making much quicker too. There are other techniques that can be used to attach yarn to the bases so do have a search on the internet, but now you can see how I do it to get you started!

Posted on Leave a comment

Yarndale

I had to do a blog about our weekend away as we had the loveliest time. We are lucky that we both go, which means that we can both have a wander too, although I’ll admit it’s me who does most of the wandering! We drove down on the Friday and stopped over as it’s a bit of a trek from us and saw this rainbow as turned up!

After setting up Saturday, we went out for tea. Our boys were having lots of fun at Grandad’s, so it was nice to be able to relax and enjoy some child-free time! After breakfast, I dropped Rich off and it was back to the hotel room for me. It was the first lesson for the last year of my uni course, so I needed to attend, but luckily it was online. I was done by half twelve, so I set off to join Rich on the stall. He’d met lots of you lovely lot in the morning, and I was put to work as we were close to running out of our business cards with a little stitch marker on them! I enjoyed chatting to those of you who popped by and came to say Hi whilst I did them, and later in the afternoon I had a wander too. Over the two days, I think I managed to get to most stalls and I really enjoyed seeing them all, (more!) chatting and of course shopping! There was lots more I could have bought but I had to restrain myself!

Here are my beautiful purchases! If you go over to my Instagram, I have tagged the stalls there that I could. I’ve met the lovely owners of Attic Spin Dye at a few markets now and always enjoy catching up with them. I love their selection of yarn, and when I saw this one I knew it would be perfect for my mermaid-y blanket (and it came with a cute little stitch marker too!). I bought the yarn used to make the granny square from another lovely yarn seller at a previous market and chose the colours on my yarn tags to go with it. I’m not usually keen on making squares that need joining but I fancied it for a change and am slowly making them to form a big mermaid colour themed blanket… eventually! When I saw this yarn by Attic Spin Dye I knew it was perfect, with a few more lilac -y pinks in to pull all my colours together.

I have my yarn ball and picture which will look lovely in my sea-side themed crafty room, along with my sweet little whale. I couldn’t resist the notebook, it is just so cheerful, and the little bunny keyring in a waistcoat was another “just because” purchase. Whilst looking at the cute felt shapes I got chatting and someone mentioned teacher gifts and I knew they would be perfect. I usually do a hamper style gift for the staff room but like to give a little gift to my boys’ key teachers too. These will be perfect – they can decorate them with the lovely thread I got and put them with one of our made with love tags that they can write their names on the back of. I should have some left over too which I am looking forward to decorating myself! Back to practical things – a yarn winder! My last one broke and so I reinvested because I love how yarn looks when its wound into little cakes. It lives on the topper of my Ikea trolley…you can see where I put a cup on it!! And finally, you all know I love a bag and this structured Yarndale bag with a magnetic fastening was one I couldn’t resist.

Finally, back to our stall!! I spent most of Sunday sat crocheting, chatting and enjoying meeting lots of you and hearing your thoughts and ideas. We were overwhelmed by how many of you came to find us and say Hello which we loved. Last year we had only been going a few months and were very new to it all and were so nervous! This year, we felt more relaxed and really enjoyed it. I also felt like I knew not only those I had chatted to before attending last year, but even more people! I always worry as I really struggle to recognise faces especially in a crowd, but the crochet/yarn world is such a lovely community that I needn’t have, and it is one that we really feel privileged to be a part of. For any of you who have met us this weekend for the first time, there’s an about us blog with a bit more information about us both if you’re interested, but I’m Lydia, blogger, crocheter and the one behind our social media. My husband Richard is the one with years of experience in drawing offices, which equips him with the skills needed to design all my (and your!) ideas and cut/engrave them on his laser cutter. We both work day jobs and have two boys (currently aged 4 and 6) who keep us on our toes, so Rich usually cuts, packs and posts on a Monday evening and a Friday but will reply most evenings to other enquiries and custom orders.

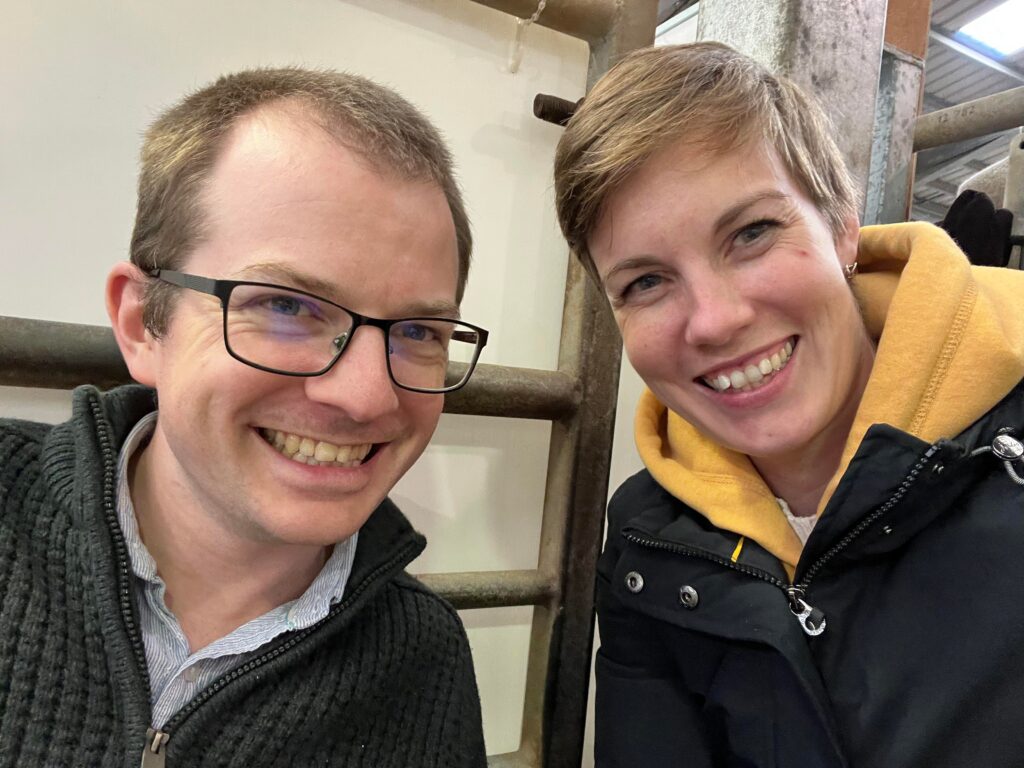
Here we are wrapped up on the Sunday! Thank you so so much for all your support, we cannot express how much we appreciate it. I really hope all of you who were able to go had a fab time at Yarndale, and enjoy your purchases!