
One of #Marchmeetthemakers prompts was “A day in the life of”, which then got me thinking about our products and the entire process from start to finish. So if you’re interested, here’s a bit of a peek behind the scenes!
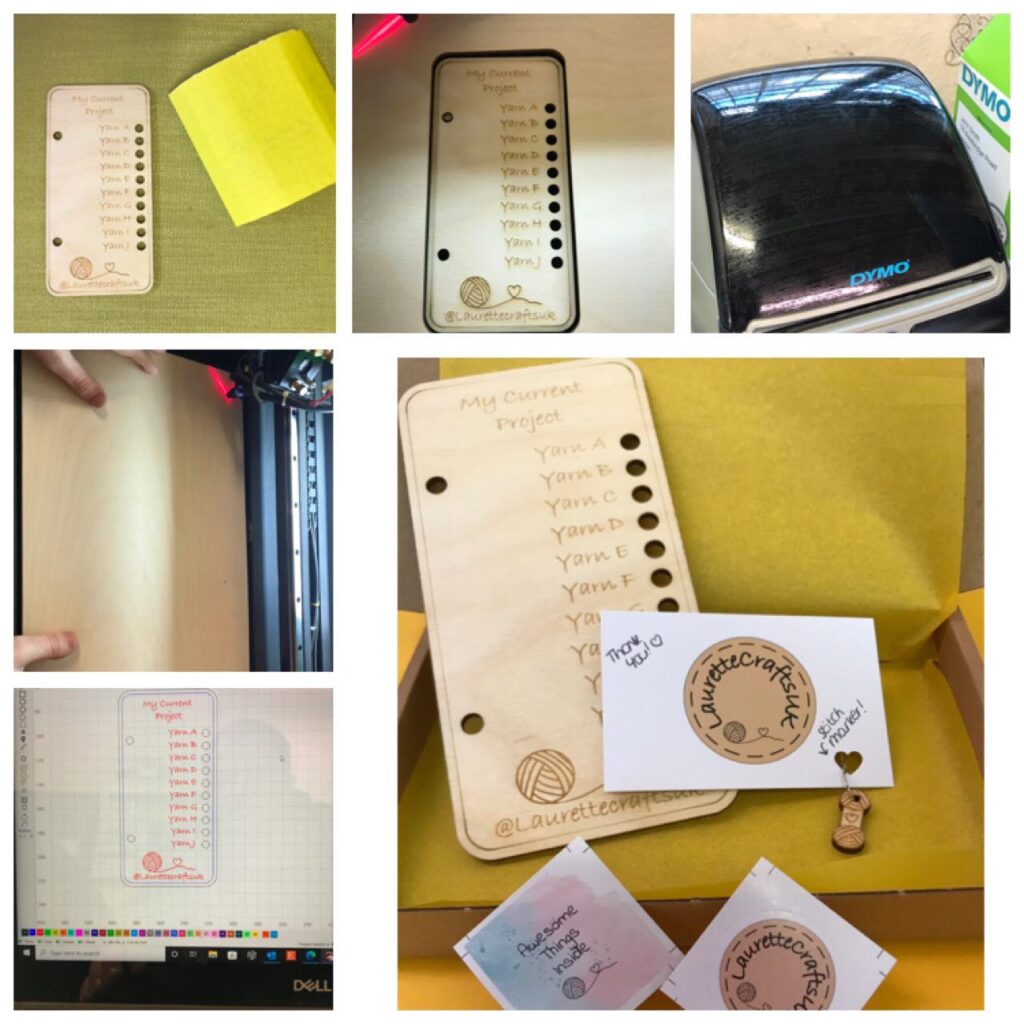
So, first of all, we need an idea! I’m going to show you an engraved shade card. The idea of this came about because we had a few people asking how they could make our shade cards reusable. Crocheting and our other crafty hobbies are fun, and the aim of all of our makes is to be things that are going to be useful and help you have even more fun. By having Yarn A etc, this correlates with a lot of patterns and means that once a project has been completed, you can simply take the yarn off and change it to whatever colours you are using for your next project! For those of you that haven’t used a shade card before, they are used so that when you are completing a project with multiple colours of yarn, and have discarded the colours from the balls of yarn, you can still easily identify them by comparing the swatch on your shade card to your yarn ball!

Once we have an idea, it then needs to be designed! Rich has extensive experience using the software needed from his previous full time jobs over the past approx. 15 years, and so this is where he steps in! This item didn’t need as much design work as we had previously done all the design and prototyping and improving for the blank and personalised shade cards, so for these we just needed to decide on a title and put the text on.
Once he has brought the item up on his laptop and it is ready to cut, he turns on the laser cutter. This is serviced/cleaned weekly, then before each cut he makes sure that its all properly aligned. Then he presses go and it does its thing (at least that’s what it looks like from where I sit!!). He has to watch it at all times as due to the nature of it, there is a risk of fire.
Once the laser has finished, Rich takes it off the laser bed and on to the next part of the process. Most of our items (including our shade cards) are wiped and sanded, to ensure that they look their best when they come to you.
The next part depends on what we are doing with the item. If it is that this is a test item, then we will make any necessary changes. Once it is perfected, we then need to work out a cost. This is sooo hard! We keep our prices as low as we possibly can, but it is difficult with the rising prices of most things. As well as needing to cover the cost of materials, cutting/engraving, packaging and postage, we also need to cover things like listing and selling fees, as well as rent, utilities and other things like upkeep of the laser and fees associated with the software used, plus of course enough for Rich to take a wage as this is his main income now! Once this has been worked out, we then need to photograph and list the item on Etsy and our website. If it is that this item is for an order, then its straight to the fun bit – packaging! Once it is packaged, Richard generates the postage label, and takes it to the post office!
My part in the process aside from ideas, is to put the item to use to make sure it works. My other role is social media, so I get to post on our Insta/FB pages. I love this side of things and have made so many friends through it. It’s also how I can show you all of our things. I get so excited when we have new things to share, and also love when you have ideas for us too! So do let me know if there’s anything else that you would like us to make 😊 and I look forward to sharing our next ideas with you!
